Zentyal 2.2 RC2 was released on Thursday, so we are almost there, Zentyal 2.2 stable version will be ready in a few weeks. One of the new features that was not present in 2.0 is the new Captive Portal module. We raised enough money in our fundraising initiative so finally the module was included in 2.2 release :)
Official doc is still in the oven so I’m going to explain how to use the module, this will help you if you want to join testing efforts.
What is a Captive Portal?
A captive portal limits users access to the Internet redirecting any web request to a login page. When the user correctly authenticates he/she is allowed to navigate and use any of the network services.
Captive portals are typically used at WiFi hotspots but also in wired networks at hotels, schools, airports…
Basic configuration
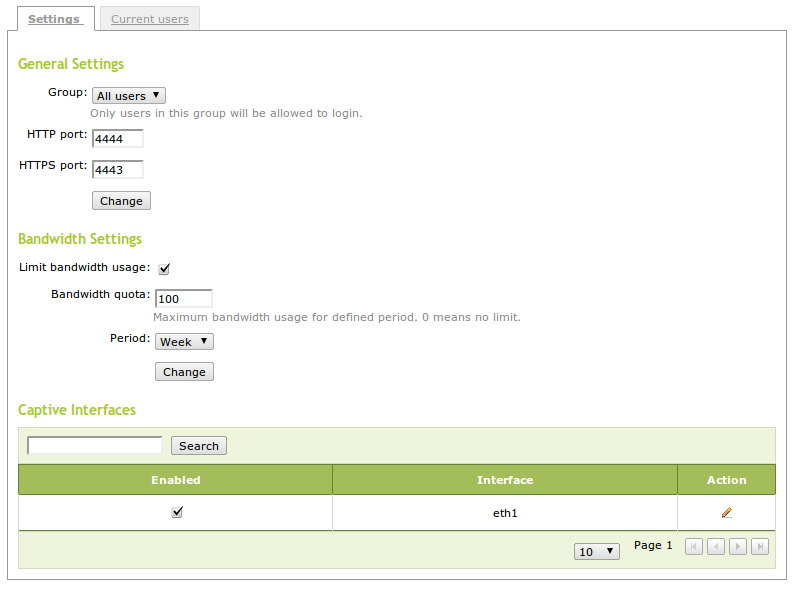
Zentyal Captive Portal is very easy to configure, you just need to select interfaces where you want to control access and the group of users who will be allowed to log in:

Also, if you installed Bandwidth Monitor module, you can setup a bandwidth usage quota. This will measure and control bandwidth usage for each connected user, forbidding access to those who exceed it.
Accessing trough Captive Portal
From the user point of view this is what will happen:
First time you connect through a captive interface your web browser will redirect to a login for any request:

Once you have logged in, a popup window will open. This window is in charge of keeping your session alive. It’s used by Zentyal to know if you left just closing the web browser without logging out.

Conclusions
I think Captive Portal has been a very requested feature and I’m glad Zentyal finally has it! This was a good example on how the community helped us to make a decision about a new feature we should include and crowdsourcing made the funding possible.
If you liked this tutorial, give the module a try and give us feedback! Zentyal 2.2 is just around the corner!
